Translate This Page!

Friday, June 8, 2012

Tsukema's Review!


Traducido por: Lucía Gutiérrez. Ver. Española: AQUÍ
Hi!
Today I bring you some false eyelashes from an e-bay vendor that many bloggers had mentioned, between them, Nenachin.
The concerned eyelashes are: THESE. Go to the vendor for more cute thigs  <3

Packing~
Open... Many, right?? *O*

 And here is a close-up ^^ Cute, eh *^*

(rate pic by: http://sparkleapple.blogspot.com.es/)
General score:Photobucket
They are very nice and they are similar to the Dolly Wink n∫1: Dolly Sweet. They are the ones I use, because I think they give a finish very dolly *^*


The only point that I have gone down is because they are not as long as those I mentioned before, so for me, that I have a medium eye, they suit me perfectly. For someone who has a small eye, they will be perfect for a  gyarumake -up. For those who have big eyes... I think these eyelashes will be small and should cut a piece to get them longer.
Even, in my opinion, they are a bit small TT^TT
So... that's the only fault I see in these false eyelashes
They are very flexible, so they are easy to put and to stick =) Actually... more than the Dolly's Sweet XD
Quality/quantity/price relation, good =)
The only unpleasant thing is that they don't have glue ^^u I recomend you Duo Glue or the one from Dolly Wink ;)


And I leave you some pictures to see them!

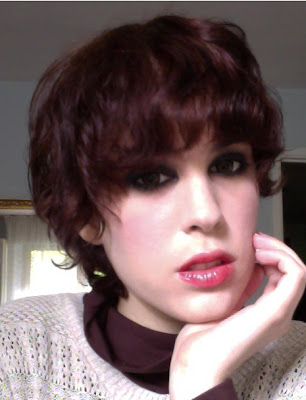
 A close-up =) These are the sunflower contact lens from Noir *^* My eyes became brighter!! *O* Yay, yay!

I dyed my hair more red *^* But I don't know if it will last because next Wednesday I will be, again, model for 'Rizos' and... well, I'll try to convince them to dye me with a carrot ginger with yellow ends XD And, if I fail,  two-colored powah' xD And if I don't get even that, I will copy my beloved Mia and Sumi and I'll dye blond + pink. Or Blue XDDDDD

As I can't take good pictures of myself with my Canon, I use my mother's one, I do it better TT^TT *indignation and defeat*

This one remember me to Mizukitty.

A silly picture is a silly picture~~xD

 And I say goodbye with the only one in which you may see fairly well the make-up X_D oh, yeah XD
I really love these eyelashes and I'm saving to buy more! *^*
Thanks to all! <3

Tuesday, June 5, 2012

Make-up inspired: 10s

Ver. ESPAÑOLA: AQUÍ
Traducción por: Lucía Gutiérrez
Hi!
I’m glad that you enjoy my last post! ^^
Today I will show you some make-ups inspired in every decade through the history (the 10s, the 20s). These make-ups won’t be 100% equal as they were on that years because they are only inspired on them, so I hope you understand ^^

The first one is ‘The 10s make-up’. It’s a very ‘gothic’ make-up because we will have pale skin, smoky eyes and dark colors in our lips =) So… I will explain it step by step with some pictures – illustrations made by me – with a final photograph of me where you could see how it will look. Of course, we must know that facial structures are different in each person and it won’t remain exactly the same!

- Step 1:
- Apply a foundation more pale than the tone of our skin (one or two tones – I recommend you two – less), without any eye concealer or something that hide the bags under the eye, we want see them.
-Apply a layer of translucent powder (is better a pale or, instead, a normal one but DON’T USE a dark one) so that the face becomes smooth and without any shine from our skin.

-Step 2:
- Make a black smoky eye, with ROUNDED finish. Take special care of blurring it well. Delineate the water line and, also, if we can, the upper water line with black eye-liner.

- Step 3:

- Apply ABUNDANT black mascara up and down, to the corner of the eye. 

- Step 4:
In the 10s, the original lip was a slide lip. Nowadays, this way would be strange so we will apply only a red intense gloss (you can choose the tone, providing it is a ‘red wine’ tone minimum. You can apply or even mix them up to purple).

- Step 5 [FINAL]:
Finally, apply a pink ‘rounded blush’ blush at the top of the cheek, so that it invades the eyecup a little, but just a little. As we have charged a lot lips and eyes, we will do a discreet blush.

And… that’s all!

I leave you some pictures so you can see the result:

Photos with my Mac, my camera didn’t react well with the light of the rest of the house. I hope to put new photos soon =)

That’s all for today! Photos NOT edited.

I hope you enjoyed this tutorial and, don’t forget that if you take photographs of your version, you can find me in Twitter to show me your result.

Tuesday, April 10, 2012

The secret of the circle lenses!

Hoy voy a hablar sobre esta entrada (http://miu-chan.blogspot.com.es/2012/01/el-secreto-de-las-circle-lenses.html) que ya hice en mi blog, sólo que esta vez, traducida, para que lo pueda leer todo el mundo ^^

So, today I'm going to talk about this post http://miu-chan.blogspot.com.es/2012/01/el-secreto-de-las-circle-lenses.html, so, Thanks to Haneul Moon to translate to me this time!

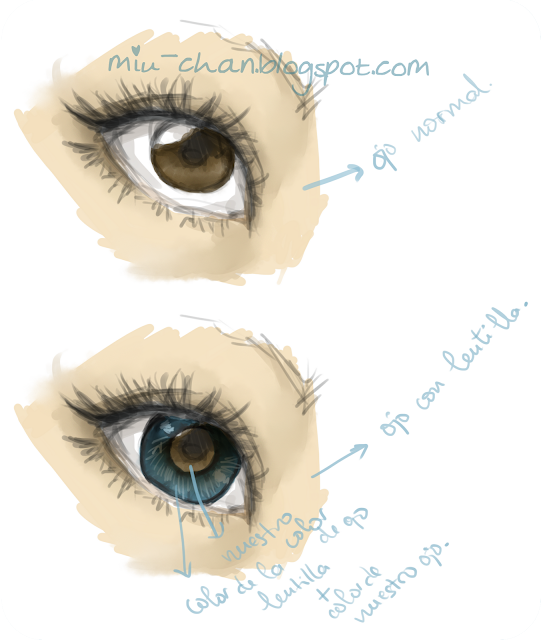
First Pic: Normal Eye.
Second Pic: Eye + Circle Lense. You can see the colour of the eye + colour of the lense.


What  usually happens with light-colored eyes, be them light brown, green, blue or grey, is that the natural eye color can be seen throgh the space in th lense meant for us to see. If you look at the pictures in a lot of reviews, you can see this happen. What are the disadvantages of this? Tha somentimes it gives the effect that our eyes are looking each in different directions. This is because the lenses are not entirely set correctly on our eye. You know what I mean, right?
First Pic: Normal black eye.
Second pic: black eye + lense colour.


What happens in the case of an eye that is dark-colored?  Since the color in the iris and the color in the pupil are almost the same, when you put on the lenses the whole center looks like it's the pupil. (At least in my case, my eyes don't get lighter even with direct light to them).The disadvantage of this is that all the lenses you try on will look darker on your eye, and somentimes they even change color. For example, grey ones tend to look grey. On me, green ones and blue ones look fine at the moment. If I try on brown ones, they have to be very light brown or they will be barely visible. Pink ones look violet on me. The good thin is that this effect doesn't usually on the eye.


And that's all! ^^  If  you have any questions -> FORMPRING, and I'll try my best to answer you =)


Ilustrations by: me